Welcome to your Intex Swimming Pool Manual! This guide helps you set up, use, and maintain your pool safely․ Read it carefully to ensure optimal performance and longevity․ Install safety barriers to prevent accidents and follow maintenance tips for a clean, enjoyable swimming experience; Happy swimming!
Purpose of the Manual
This manual is designed to guide you through the safe and proper setup, operation, and maintenance of your Intex swimming pool․ It provides detailed instructions to ensure optimal performance and longevity of your pool․ The manual covers essential topics such as installation, water treatment, and troubleshooting․ By following the guidelines, you can enjoy a clean, safe, and enjoyable swimming experience․ Always prioritize safety precautions and regular maintenance to maximize your pool’s durability and functionality․ This manual is your comprehensive resource for making the most of your Intex pool․
Safety Precautions
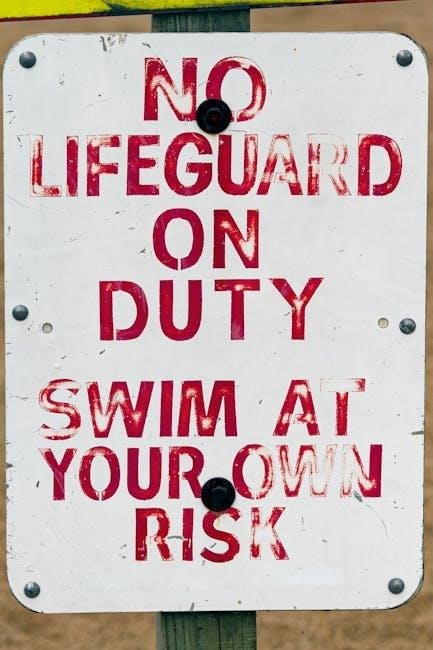
Always prioritize safety when using your Intex swimming pool․ Install a safety barrier to prevent unauthorized access, especially for children and pets․ Ensure proper supervision of kids near the pool․ Avoid using electrical appliances near water and keep the area clear of obstacles․ Regularly inspect the pool and accessories for damage․ Follow all installation and maintenance guidelines to prevent accidents․ Never exceed the recommended water level or user capacity․ Adhere to these precautions to ensure a safe and enjoyable swimming experience for everyone․
Product Overview
Your Intex swimming pool is designed for fun and relaxation, offering a durable and easy-to-assemble structure․ It includes a sturdy frame, a reliable filter pump, and an inflatable top ring for stability․ The pool is available in various sizes to suit different spaces and preferences․ With its user-friendly design, it provides a safe and enjoyable swimming experience for families․ The package also includes essential accessories like a pool liner and maintenance tools․ Follow the manual to ensure proper setup and enjoy years of hassle-free swimming․ Safety barriers and regular maintenance are key to maximizing its lifespan․
Understanding Your Intex Swimming Pool Components
Your Intex pool includes a durable pool structure, a reliable filter pump, an inflatable top ring for stability, and essential accessories like hoses and connectors․ These components ensure safe and enjoyable use․
Pool Structure and Accessories

Your Intex pool features a durable, inflatable top ring and a sturdy frame for stability․ The pool liner ensures water tightness, while the filter pump and strainer grid keep water clean․ Accessories like the nozzle and valve simplify maintenance․ Safety barriers, such as fences or covers, are essential to prevent accidents․ Regularly inspect all components to ensure proper function and longevity․ Follow manual guidelines for assembly and care to enjoy your pool safely and efficiently throughout the season․
Filter Pump and Filtration System
Your Intex pool’s filter pump and filtration system are essential for maintaining clean and safe water․ The filter pump circulates water, removing dirt and debris, while the filtration system ensures optimal water clarity․ Regularly clean the filter cartridge to prevent clogs and maintain efficiency․ The strainer grid protects the pump from large objects․ Proper maintenance of these components is crucial for extending the pool’s lifespan and ensuring a healthy swimming environment․ Always follow the manual’s guidelines for installation and upkeep․
Inflatable Top Ring and Support
The inflatable top ring provides structural support to your Intex pool, ensuring stability and shape retention․ Proper installation involves inflating it firmly but not overfilling․ Regularly inspect for punctures or damage to maintain integrity․ Ensure the ring is securely attached to the pool frame to prevent shifting․ For optimal performance, follow inflation guidelines in the manual․ Proper care extends the lifespan of your pool, ensuring safe and enjoyable use for years․ Always deflate and store the top ring during winter to prevent damage from freezing temperatures․
Pre-Installation Requirements
Ensure a flat, stable location for your pool, install safety barriers, and level the ground properly before setup․ This ensures safe and proper pool installation and operation․

Choosing the Right Location
Choosing the right location for your Intex swimming pool is crucial for safety and functionality․ Select a flat, level surface away from power lines and overhead obstructions․ Avoid low-lying areas where water may collect․ Ensure the area is clear of sharp objects and debris․ Ideally, place the pool near a water source and power outlet for convenience․ Install safety barriers to prevent unauthorized access, especially for children and pets․ Proper placement ensures a safe and enjoyable swimming experience while adhering to local regulations and safety guidelines․
Leveling the Ground
Properly leveling the ground is crucial for safe and stable pool installation․ Use a shovel to create a flat surface, ensuring no rocks or uneven areas remain․ A spirit level can help verify evenness․ If the ground isn’t level, the pool may not assemble correctly or could collapse․ Mark the area with stakes and string to guide your digging․ Once leveled, compact the soil to prevent settling․ A well-prepared base ensures your Intex pool operates smoothly and lasts longer․ Always follow the manual’s specific leveling instructions for optimal results․
Tools and Materials Needed
Before starting, ensure you have all necessary tools and materials․ These include a screwdriver, wrench, measuring tape, garden hose, and ground cloth․ Additional items like sand or padding for leveling and protective gloves are recommended․ Ensure all pool components, such as the frame, liner, and pump, are included in the package․ Refer to the manual for specific tools required for your model․ Having everything ready will streamline the installation process and ensure safety․ Proper preparation is key to a successful setup․
Step-by-Step Installation Guide
Welcome to the Intex pool installation guide․ Follow these steps for a smooth setup: unpack parts, assemble the frame, attach the liner, inflate the top ring, and connect the filter pump․ Ensure all components are secure for safe and enjoyable use․
Unpacking and Organizing Parts
Begin by carefully unpacking all components from the box․ Ensure no parts are damaged or missing․ Organize items like the pool frame, liner, filter pump, inflatable top ring, and accessories․ Separate hardware (e․g․, screws, connectors) and place them in labeled containers for easy access․ Check for a strainer grid to prevent filter clogs․ Lay out instructions and tools nearby․ This systematic approach ensures a smooth assembly process and minimizes delays․ Proper organization is key to a stress-free setup experience․
Assembling the Pool Frame
Begin by unpacking and organizing all frame components․ Attach the legs to the pool base securely, ensuring stability․ Connect the side panels to the base using the provided hardware․ Tighten all bolts firmly but avoid over-tightening․ Ensure the frame is level and evenly supported․ Double-check all connections for stability before proceeding․ If your pool has an inflatable top ring, attach it after the frame is fully assembled․ Follow the manufacturer’s instructions for proper alignment and tightening to ensure a safe and durable structure․
Attaching the Pool Liner
After assembling the frame, carefully unpack and lay the pool liner inside the structure․ Ensure it aligns perfectly with the frame edges․ Use a rubber mallet to gently tap and secure the liner in place․ Check for any wrinkles or air pockets and smooth them out; Inspect the liner for tears or damage; repair if necessary using the provided repair kit․ Proper installation ensures a leak-free and safe swimming experience․ Follow the manufacturer’s guidelines for tightening and securing the liner to prevent shifting or damage during use․
Inflating the Top Ring
To inflate the top ring, attach the electric pump or manual pump to the valve․ Turn on the pump and monitor the ring’s firmness․ Ensure it’s fully inflated for stability; Avoid over-inflation to prevent damage․ Once firm, secure the ring tightly to the pool frame․ For storage, deflate the ring carefully to avoid stretching․ Always follow the manufacturer’s guidelines for proper inflation and deflation to maintain the pool’s structural integrity and safety․
Connecting the Filter Pump
To ensure clean and safe water, connect the filter pump correctly․ Attach the strainer grid to prevent debris from entering the pump․ Securely connect the hoses to the pool inlet and outlet, ensuring they are tightly fitted․ Place the pump on a level surface near the pool․ Plug in the power cord and turn it on․ Allow the system to cycle through the water․ Regularly clean the filter cartridge to maintain efficiency․ Proper installation ensures optimal performance and extends the pool’s lifespan․ Always follow safety guidelines when handling electrical components․
Operating Your Intex Swimming Pool
Start by filling the pool with water, then turn on the filter pump to maintain clean water․ Regularly test and balance water chemistry for safe swimming conditions․
Filling the Pool with Water
To fill your Intex pool, use a garden hose with a soft nozzle to prevent liner damage․ Ensure the strainer grid is installed to protect the filter pump․ Fill the pool to the recommended water level, avoiding overfilling․ Connect the hose to a nearby water source and allow the pool to fill slowly․ Once filled, tighten all connections and ensure the top ring is fully inflated․ Finally, connect the filter pump to maintain clean water․ Always follow safety guidelines and avoid overfilling to prevent water from spilling over․
Starting the Filter Pump
To start the filter pump, ensure the strainer grid is clean and properly installed․ Plug in the pump, turn it on, and check for leaks․ Place the pump on a level surface, away from water splashes․ The filter pump ensures clean water by circulating it through the system․ Regularly clean the cartridge to maintain efficiency․ Always follow safety guidelines and manufacturer instructions for optimal performance․ Proper operation extends the pool’s lifespan and keeps the water safe for swimming․ Monitor the pump’s function to ensure consistent water clarity and hygiene․
Maintaining Proper Water Chemistry
Maintaining proper water chemistry is crucial for a safe and enjoyable swimming experience․ Regularly test and balance pH and chlorine levels using a test kit․ Adjust chemicals as needed to ensure water clarity and prevent eye irritation․ Test the water after heavy use or weather changes․ Avoid over-chlorination to maintain a healthy environment․ Always follow the recommended chemical dosage in your Intex manual for optimal results․ Proper water chemistry extends the life of your pool and ensures swimmers’ comfort and safety;
Regular Cleaning and Skimming
Regular cleaning and skimming are essential for maintaining your Intex pool’s hygiene and clarity․ Use a pool skimmer to remove floating debris daily, and vacuum the pool floor and walls weekly․ Clean the strainer basket and filter cartridge regularly to ensure proper water circulation․ Check and adjust water levels as needed to maintain optimal performance․ Regular maintenance prevents damage and keeps your pool safe and enjoyable for swimming․ Consistent upkeep also extends the lifespan of your Intex pool and its components․
Maintenance and Upkeep
Regular maintenance ensures your pool remains clean and safe․ Clean the filter cartridge weekly, skim debris daily, and winterize properly to extend its lifespan and performance․
Daily Maintenance Tips

Regular maintenance ensures your pool remains clean and safe․ Skim the surface daily to remove floating debris and vacuum the pool floor weekly․ Check the filter cartridge and clean it as needed to maintain proper water circulation․ Monitor water levels and adjust to ensure the skimmer operates efficiently․ Test and balance pH levels regularly to prevent algae growth and maintain clear water․ Inspect the pool liner for punctures or damage and address issues promptly․ Keep the surrounding area clean to prevent dirt from entering the pool․ Consistent upkeep ensures a safe and enjoyable swimming experience for everyone․
Cleaning the Filter Cartridge
Regularly cleaning the filter cartridge is essential for maintaining your pool’s water quality․ Turn off the pump and remove the cartridge․ Hose it down to eliminate debris, then soak it in a mixture of water and mild detergent; Rinse thoroughly and allow it to dry before reinstalling․ Clean the cartridge every 1-2 weeks, depending on usage․ Replace it if damaged or worn out․ Proper maintenance ensures efficient filtration and prolongs the pool’s lifespan․ Always refer to the manual for specific cleaning instructions tailored to your Intex pool model․
Winterizing the Pool
Winterizing your Intex pool is essential to protect it from damage during colder months․ Start by draining the pool completely and cleaning it thoroughly․ Remove and dry all accessories, including the filter pump and hoses․ Store these components in a dry, protected area․ Apply a pool cover to prevent debris accumulation and ensure the pool remains clean․ Regularly inspect the cover and address any issues promptly․ Proper winterization ensures your pool remains in great condition for the next swimming season․ Follow these steps to maintain your pool’s longevity and functionality․
Troubleshooting Common Issues
Troubleshoot common issues like leaks, filter pump malfunctions, and cloudy water․ Regular maintenance and proper chemical balance can prevent many problems․ Refer to the manual for detailed solutions․

Leaks and Damage Repair
Inspect the pool for leaks, especially around seams and connections․ Use the provided patch kit to repair minor damages․ Apply adhesive to the patch and press firmly․ For larger tears, drain the pool partially and allow the area to dry before repairing․ Regularly check the inflatable top ring for punctures․ Addressing leaks promptly prevents further damage․ If issues persist, contact Intex customer support for assistance or replacement parts․ Proper repair ensures your pool remains safe and functional for years․
Filter Pump Malfunction
If your Intex filter pump malfunctions, first check for blockages in the strainer grid or impeller․ Ensure the pump is properly connected to power and all hoses are secure․ Clean or replace the filter cartridge if dirty․ If issues persist, consult the manual for troubleshooting steps or contact Intex customer support for assistance․ Regular maintenance can prevent such problems and ensure smooth pool operation․
Cloudy or Dirty Water
Cloudy or dirty water in your Intex pool can result from poor filtration, insufficient chemical balance, or contamination; Regularly clean the filter cartridge and ensure the filter pump operates correctly․ Check chlorine and pH levels, adjusting as needed․ Shock the pool if necessary to eliminate contaminants․ Skim debris daily and vacuum the pool floor to maintain clarity․ Proper maintenance ensures safe and enjoyable swimming conditions․ Always follow the recommended chemical dosage to prevent water quality issues․

Safety Barriers and Accessories
Install a sturdy pool fence and use durable pool covers to prevent unauthorized access and accidents․ These accessories enhance pool security and ensure a safer swimming environment for everyone․
Installing a Pool Fence
Installing a pool fence is crucial for safety, especially for children and pets․ Choose a durable material like metal, wood, or vinyl, ensuring the fence is at least 4 feet tall․ Select a style that complements your yard while providing visibility․ Before installation, level the ground and mark the area where the fence will be placed․ Secure the posts firmly and attach the panels, ensuring no gaps are large enough for a child to pass through․ Regularly inspect the fence for damage and maintain it to ensure ongoing safety and reliability․
Using Pool Covers
Pool covers are essential for maintaining your Intex swimming pool․ They prevent debris from entering the water, reduce evaporation, and help retain heat․ Use a high-quality cover to keep your pool clean and safe when not in use․ Ensure the cover fits snugly and is durable․ Regularly inspect for tears or damage and replace as needed․ Pool covers also act as a safety barrier, preventing accidental falls․ Follow the manufacturer’s instructions for installation and maintenance to maximize their effectiveness and extend your pool’s lifespan․
Additional Safety Equipment
Besides fences and covers, consider adding non-slip mats around the pool area to prevent falls․ Install emergency flotation devices and ensure a first aid kit is nearby․ Use pool alarms to detect unauthorized access, especially for children and pets․ Regularly inspect all safety equipment to ensure proper function․ These measures, combined with responsible supervision, create a safer swimming environment․ Always follow the manual’s guidelines for equipment installation and maintenance to maximize safety and enjoyment of your Intex pool․
Warranty and Customer Support
Your Intex pool is backed by a comprehensive warranty․ For inquiries or issues, contact Intex customer service․ Refer to your manual for warranty details and support options․
Understanding Your Warranty
Your Intex swimming pool warranty provides protection against manufacturing defects for a specified period, typically ranging from 90 days to one year․ Proper installation and maintenance, as detailed in this manual, are essential for warranty validity․ The warranty covers repairs or replacements for defective parts․ For any inquiries or claims, contact Intex customer service․ Ensure you retain your purchase receipt and manual for verification․ By following the guidelines, you can enjoy your pool with confidence, knowing you’re protected against unforeseen issues․
Contacting Intex Customer Service
For assistance with your Intex swimming pool, contact customer service via phone, email, or live chat․ Visit the official Intex website for contact details and support options․ The warranty section provides information on coverage and claims․ Ensure to have your product serial number ready for faster service․ Intex support is available to address installation, maintenance, or repair inquiries․ Refer to the user manual for troubleshooting before reaching out․ Their team is dedicated to resolving issues promptly, ensuring your pool experience remains enjoyable and stress-free․
Thank you for following the Intex Swimming Pool Instruction Manual! By adhering to the guidelines, you’ve ensured a safe, enjoyable, and long-lasting swimming experience․ Regular maintenance and proper setup are key to preserving your pool․ Always prioritize safety barriers and follow the manufacturer’s recommendations․ For any issues, refer to the troubleshooting section or contact Intex customer support․ Happy swimming and enjoy your Intex pool for years to come!